Leads FAQ’s
How do I capture leads in Spokal?
To capture leads in Spokal you can:
- Use Spokal’s Lead Generator Widget
- Use the drag & drop Spokal form
- Use a supported plugin
The plugins we support are Gravity Forms, JetPack, ContactForm7, Hybrid Connect and OptimizePress.
Keep reading to learn how to set them up.
How do I set up Gravity Forms so that it sends leads to Spokal?
In order to set up Gravity Form so that it works with Spokal, please follow these steps:
Step 1
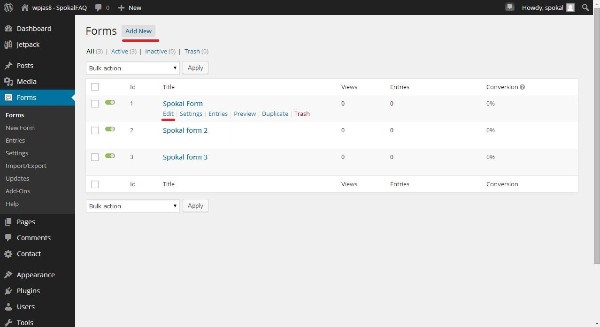
Go to the Gravity Forms page and select “edit” under the form which you want set up. If you don’t have a form already set up, select “add new” at the top of the screen.
Step 2
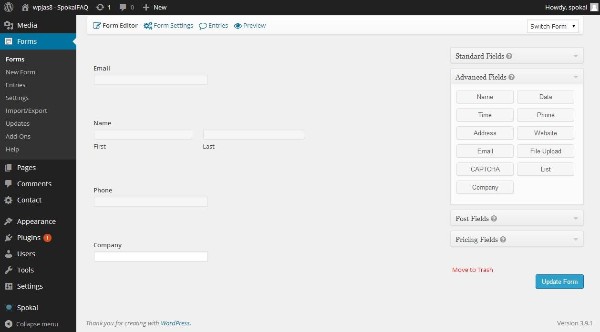
Make sure your form has an Email field. Make sure the Email field is of type Email (you can drag over the Email type field from the right hand side), and not just a regular text field called Email. This is important or Spokal won’t work.
Optionally, from the Advanced Fields section you can also use Name, Phone and Company and Spokal will pick up those fields too, but Email is the only one that is absolutely required.
After you have added these fields, click the blue “Update Form” button on the bottom right hand side of the screen to save the changes that you’ve made to the form.
Any additional fields will also be sent to Spokal, so you’ll have all the data, but only the 4 fields mentioned above will be separated out into their own fields. Try it out and you’ll see what we mean.
Step 3
Next, select the Spokal plugin page from the WordPress navigation bar to the left of the screen.
Click on the “Gravity Forms Settings” tab.
There you will see list of all of your Gravity Forms.
Note: This tab will appear only if the Gravity Forms plugin is activated.
Step 4
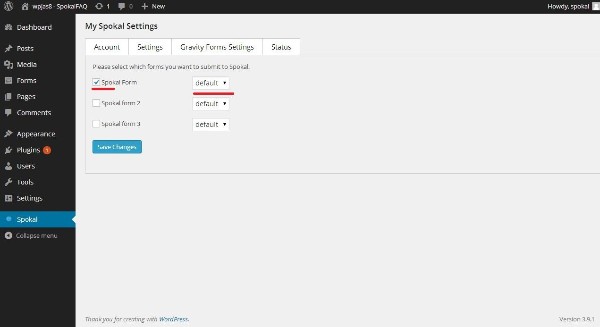
Check the box for the form that you want to be connected with Spokal.
There is a drop down menu beside each form. It will automatically be set to default, which will send your leads to the default list on Spokal. If you have more than one lead list, please select the appropriate one from the dropdown menu.
Once you’ve made the appropriate selections, click the blue “Save changes” button.
Your leads from this form will now be connected with your chosen lead list at Spokal.
How do I set up Contact Form 7 so that it sends leads to Spokal?
To set up your Contact Form 7 to Spokal, please follow the following steps carefully.
Step 1
Select “Contact” from the navigation bar on WordPress.
Step 2
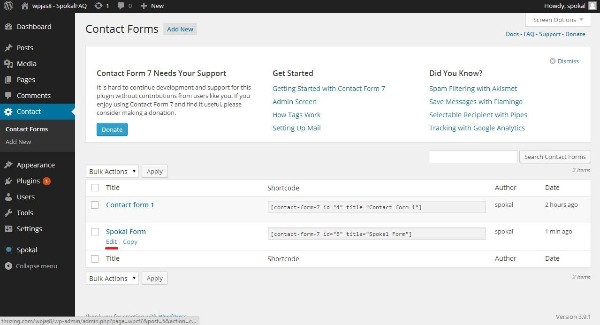
If you already have a contact form set up, select the edit button underneath the form you wish to send to Spokal. If you do not already have a form set up, select the “Add New” button beside the “Contact Forms” heading at the top of your screen.
Step 3
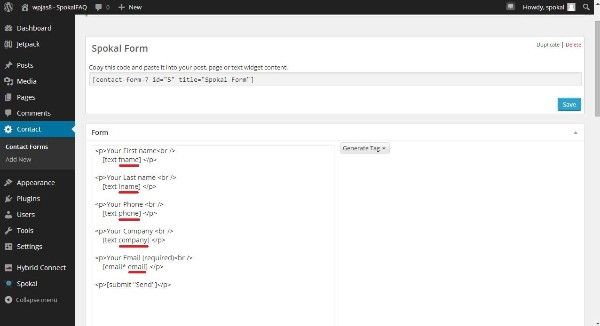
The form fields need to be named very specifically, as they are displayed in the photo below.
Only fields that have been named in this format will be sent to Spokal.
Only the “Email” field is mandatory.
Step 4
Go to the Spokal plugin page and click on the “CF7 Settings” tab.
Note: This tab will appear only if plugin Contact Form 7 is activated.
Step 5
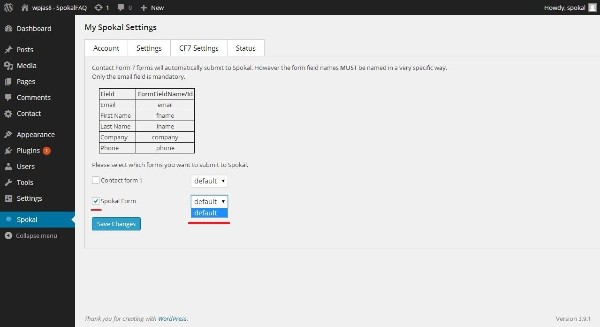
Underneath the instructions, you will see a list of your Forms that you have created in the Contact Form 7 plugin.
Check the box beside the form that you want to be connected with Spokal.
There is a drop down menu beside each form. It will automatically be set to default, which will send your leads to the default list on Spokal. If you have more than one lead list, select the appropriate one from the dropdown menu.
Step 6
Once you’ve made the appropriate selections, click the blue “Save changes” button.
Your leads from this form will now be connected with your chosen lead list at Spokal.
How can I set up JetPack Forms to send leads to Spokal?
To set up your Contact Form 7 to Spokal, please follow the following steps carefully.
Step 1
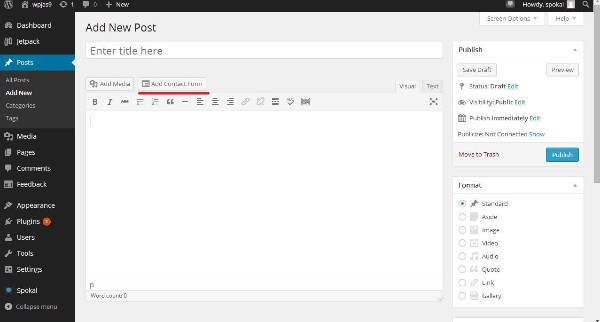
Under the WordPress “Posts” tab select “Add New” or “Edit” to create or edit your JetPack form.
Step 2
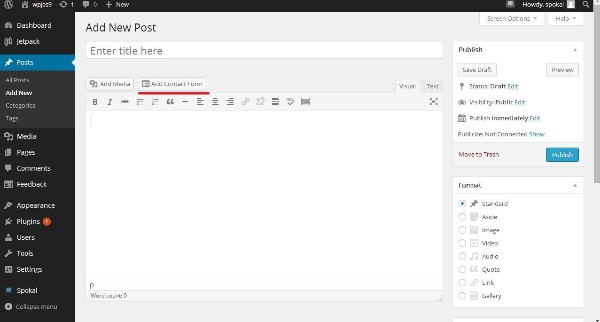
Select the option “Add Contact Form” that appears in the middle of the screen.
Step 3
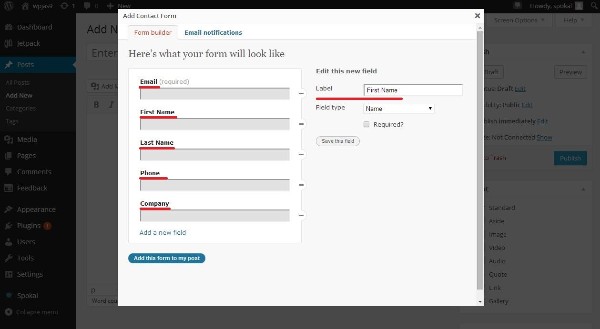
Name the form labels like they are in the figure below:
Note: Your form may contain any additional fields that you would like, but only lead information from the fields “Email”, “First Name”, “Last Name”, “Phone” and “Company” will be sent to Spokal.
Step 4
Save your form by selecting the blue “Add this form to my post” button at the bottom left hand corner of the pop-up box.
Note: If you have multiple lead lists on Spokal, JetPack forms does not allow you to choose which lead list it will be sent to. Therefore, it will be sent to you default lead list.
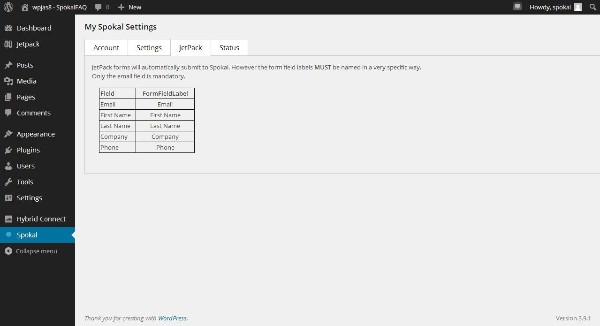
You can go check on your fields by selecting the Spokal tab from the left hand side of the page.
Choose the “JetPack” tab.
Note: This tab will appear only if Jetpack is activated.
Here you can ensure that the names for you field labels are correct.
How do I set up Hybrid Connect to send leads to Spokal?
To set up your Hybrid Connect so that it sends leads to Spokal, please follow these steps carefully.
Step 1
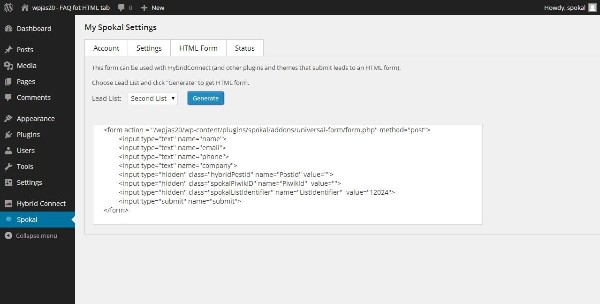
Go to Spokal plugin page and click on tab “HTML form”.
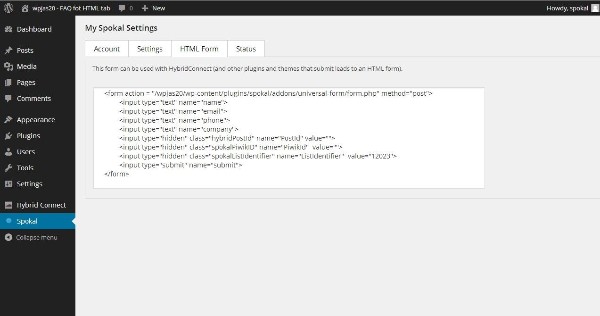
If you have only the one lead list, the form will automatically generate for that one lead list as seen in the figure below:
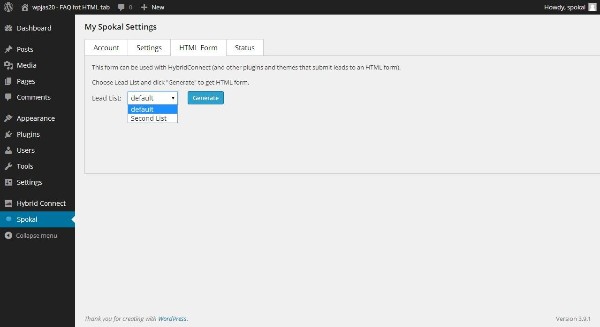
If you have more than the one lead list, under “HTML form” tab you will see a dropdown menu.
Select the lead list from the menu that you wish to use, and click the blue “Generate” button. This will generate the chosen Html form.
Select all the HTML and copy it.
Step 2
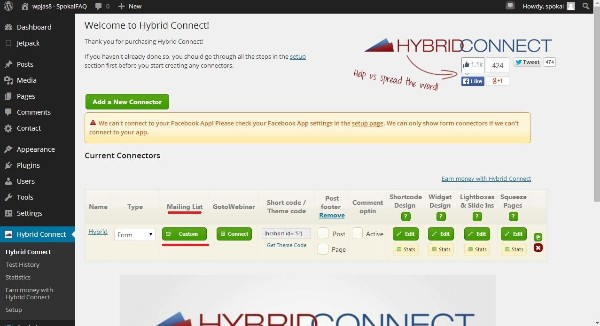
Go to the Hybrid Connect page by selecting it from the WordPress navigation bar and click to on “Add a New Connector” or change existing.
Under “Mailing List”, select the green “Custom” button.
Step 3
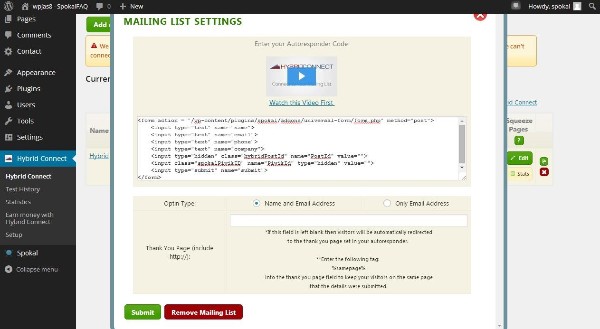
Paste the HTML that you have copied into the “Autoresponder Code” field.
Once you’ve pasted the HTML into the field, select the green “Submit” button.
Your Hybrid connector is now set up.
Your leads from this Hybrid connector will now be connected with your chosen lead list at Spokal.
How to set up Optimizepress Forms to send leads to Spokal?
Step 1
Go to Spokal plugin page and click on tab “HTML form” to get your Html Form.
Step 2
Add new Optin box or edit existing.
Step 3
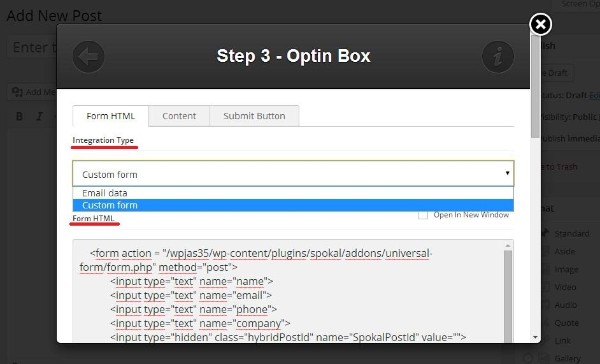
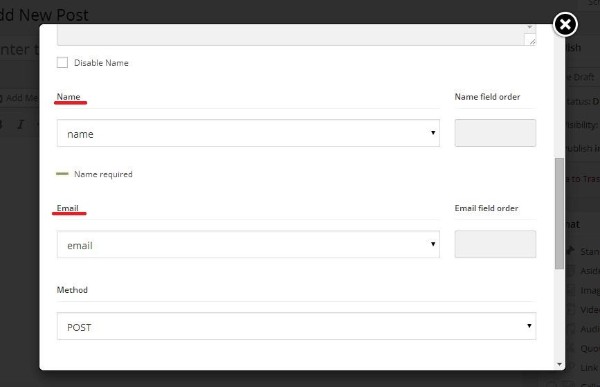
Under the “Form Html” tab, for “Integration type” choose Custom Form.
In “Form Html” field paste your Html form generated under spokal “HTML form” tab.
Inside the “Form HTML” field you can see “Name” and “Email” field where you able to see the field name from the custom Html form.
It should be automatically selected, but please ensure that these selected choices are correct.
For ”Name” it should say “name”, for “Email” it should say “email”.
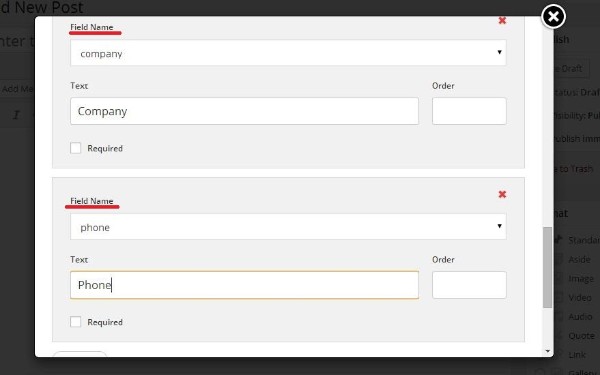
For certain Optin boxes, you will see an “Add New” button at the bottom.
Select this option to add extra fields.
For example, you can add “Company” with “company” as the text, or a “Phone” field with “phone” as the text.
Only the Email field is required.
Step 4
Click to “Insert” and you are done.
Your leads from Optimizepress will now be connected with Spokal.
